Asus Routers (AsusWRT/Merlin) Setup for Smart DNS Proxy

Sep 13, 2024
 11103
11103
It’s only necessary to set up Smart DNS Proxy one time in order to use it. After you set up Smart DNS proxy, you don’t have to follow these steps. Your connection will automatically use the correct DNS settings.
1. Open http://www.asusrouter.com in you browser to access the router Web interface (or you can enter your router LAN IP, for example http://192.168.1.1)
2. You will see the login prompt. If you have never configured your router before, the default credentials should be:
Username: admin
Password: admin
or
Username: admin
Password: empty field
(You can also check the back of your router for the default credentials)
3. Once you log in, click on the WAN tab in the Advanced Settings section.

4. Then select the "Internet Connection" tab, choose "NO" option next to "Connect to DNS server automatically" and enter the following DNS addresses:
DNS Server1: 91.148.225.50
DNS Server2: 91.148.229.50
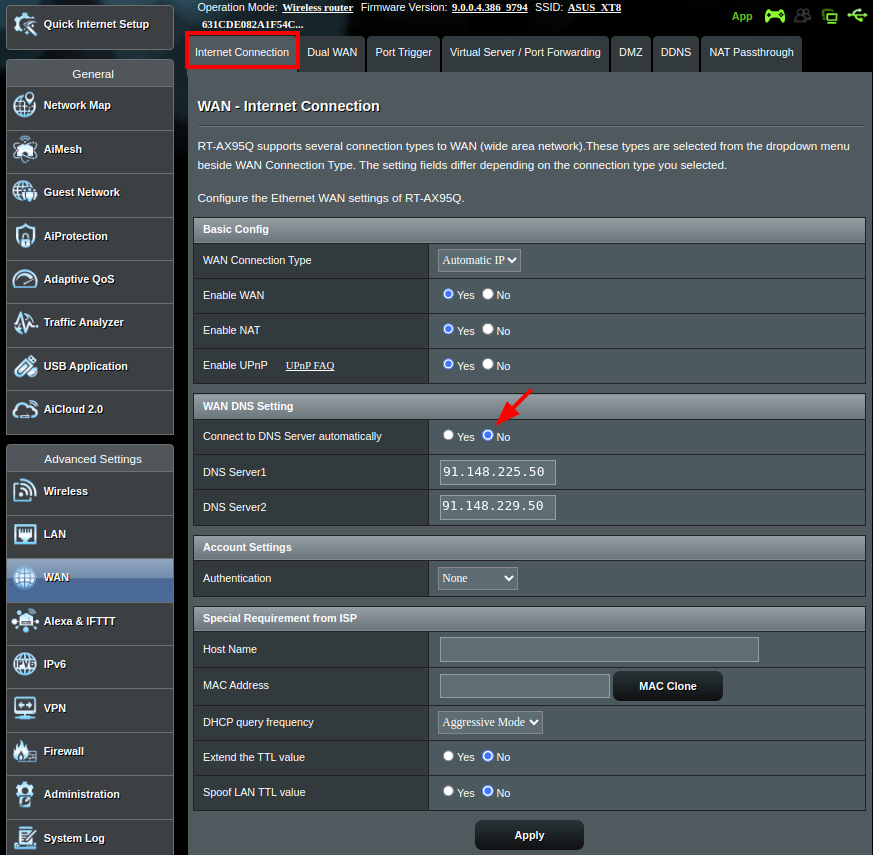
5. To save the changes, press Apply and restart your router.

If you have any questions please feel free to reach out to our support team at https://support.privadovpn.com/new

