Netgear Router Setup for Smart DNS Proxy

Sep 13, 2024
 8673
8673
It’s only necessary to set up Smart DNS Proxy one time in order to use it. After you set up Smart DNS proxy, you don’t have to follow these steps. Your connection will automatically use the correct DNS settings.
1. Launch a web browser from a computer or WiFi device that is connected to your NETGEAR router and visit www.routerlogin.net.
2. Enter the username and password (default username is admin, password is password).
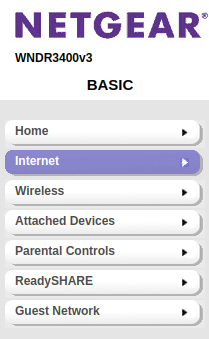
3. Select "Internet".
4. Under the Domain Name Server (DNS) Address section, select the radio button for "Use these DNS Servers" and enter the following DNS addresses:
Primary DNS: 91.148.225.50
Secondary DNS: 91.148.229.50

5. Click "Apply" and restart the router.
If you have any further questions or concerns, feel free to reach out to us via our Support Form at https://support.privadovpn.com/new or https://support.privado.live/new

