
 4455
4455
*Manual OpenVPN setup is available to Premium users only.
**The below setup is recommended for Debian-based distributions (Ubuntu, Linux Mint, Kali Linux, Elementary OS, etc).
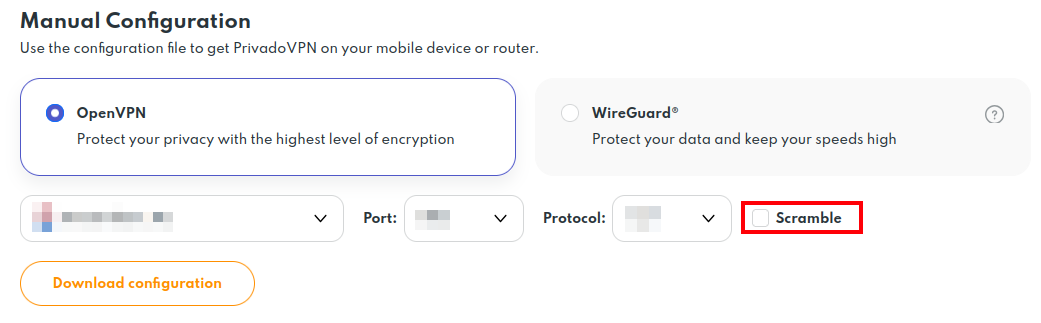
1. Generate and download the OpenVPN configuration file for the preferred location.
Important: When generating files, make sure the "Scramble" option is disabled, as the default OpenVPN client for Linux does not support it. Otherwise, the VPN will not be able to connect without additional actions.
2. Open the downloaded .ovpn file in any text editor and delete the line: "route 0.0.0.0 0.0.0.0 vpn_gateway"
Save the file and close the editor.
3. Open a terminal (command line) and run:
sudo apt install network-manager-openvpn network-manager-openvpn-gnome
sudo systemctl restart NetworkManager
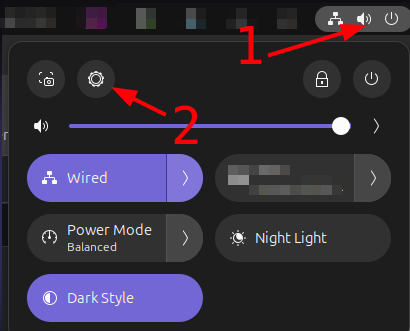
4. Open your network settings via the icon in the top-right corner:
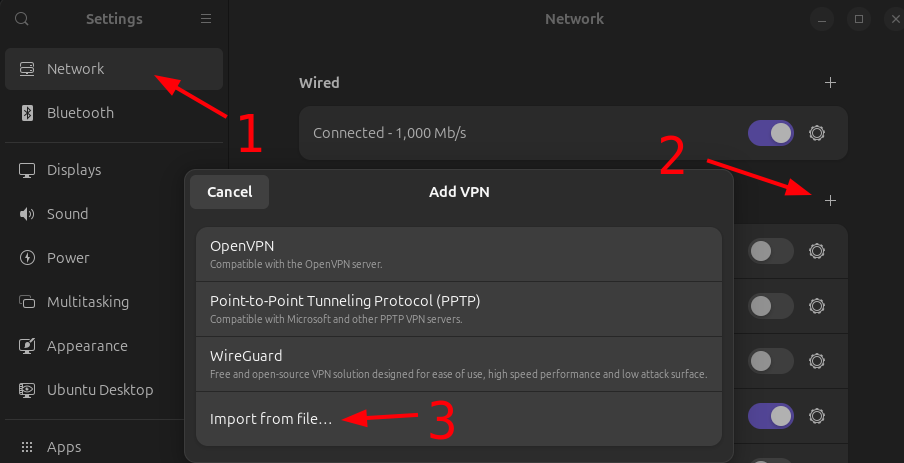
5. Go to Network -> VPN, click + -> Import from file… and select your edited OpenVPN configuration file.
4. Go to Identity, enter your username and password and click "Add":
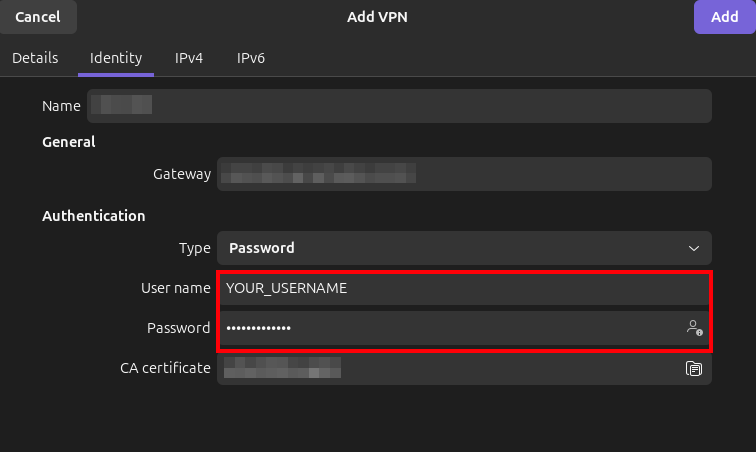
Important: Please note that your email address cannot be used as a Username for manual setup, you must use the specific username that is listed on your client page:

5. After setup, a VPN section will appear in your system menu, allowing you to connect or disconnect with a single click.
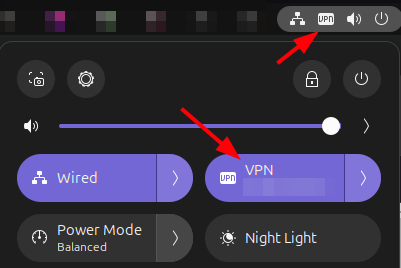
VPN setup is complete.
Setting Up Automatic VPN Connection via NetworkManager
1. Open a terminal and run:
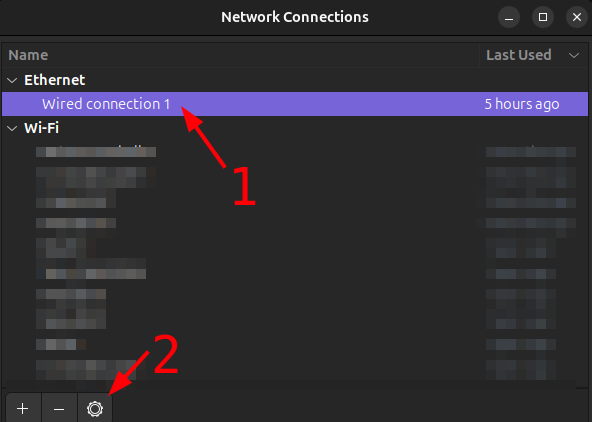
2. Launch the Network Connections editor in terminal:
This will open a graphical editor for all your network connections.
3. Select your Internet connection access point (Wired or WiFi) and click the "Gear" icon to open the Settings menu:
4. Go to the General tab, activate "Automatically connect to VPN" and select VPN profile:
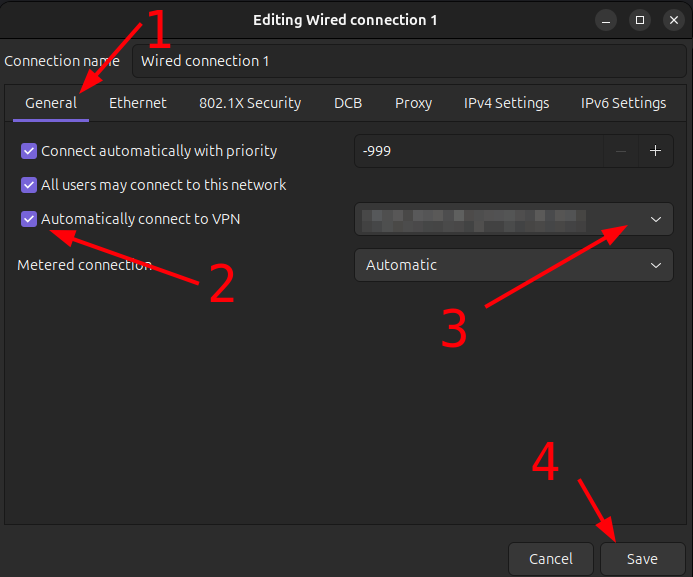
5. Save the settings.
All set! Now, the VPN will automatically connect every time your system starts.
If you have any further questions, feel free to reach out to us via our Support Form at https://support.privado.live/new.

