
 6752
6752
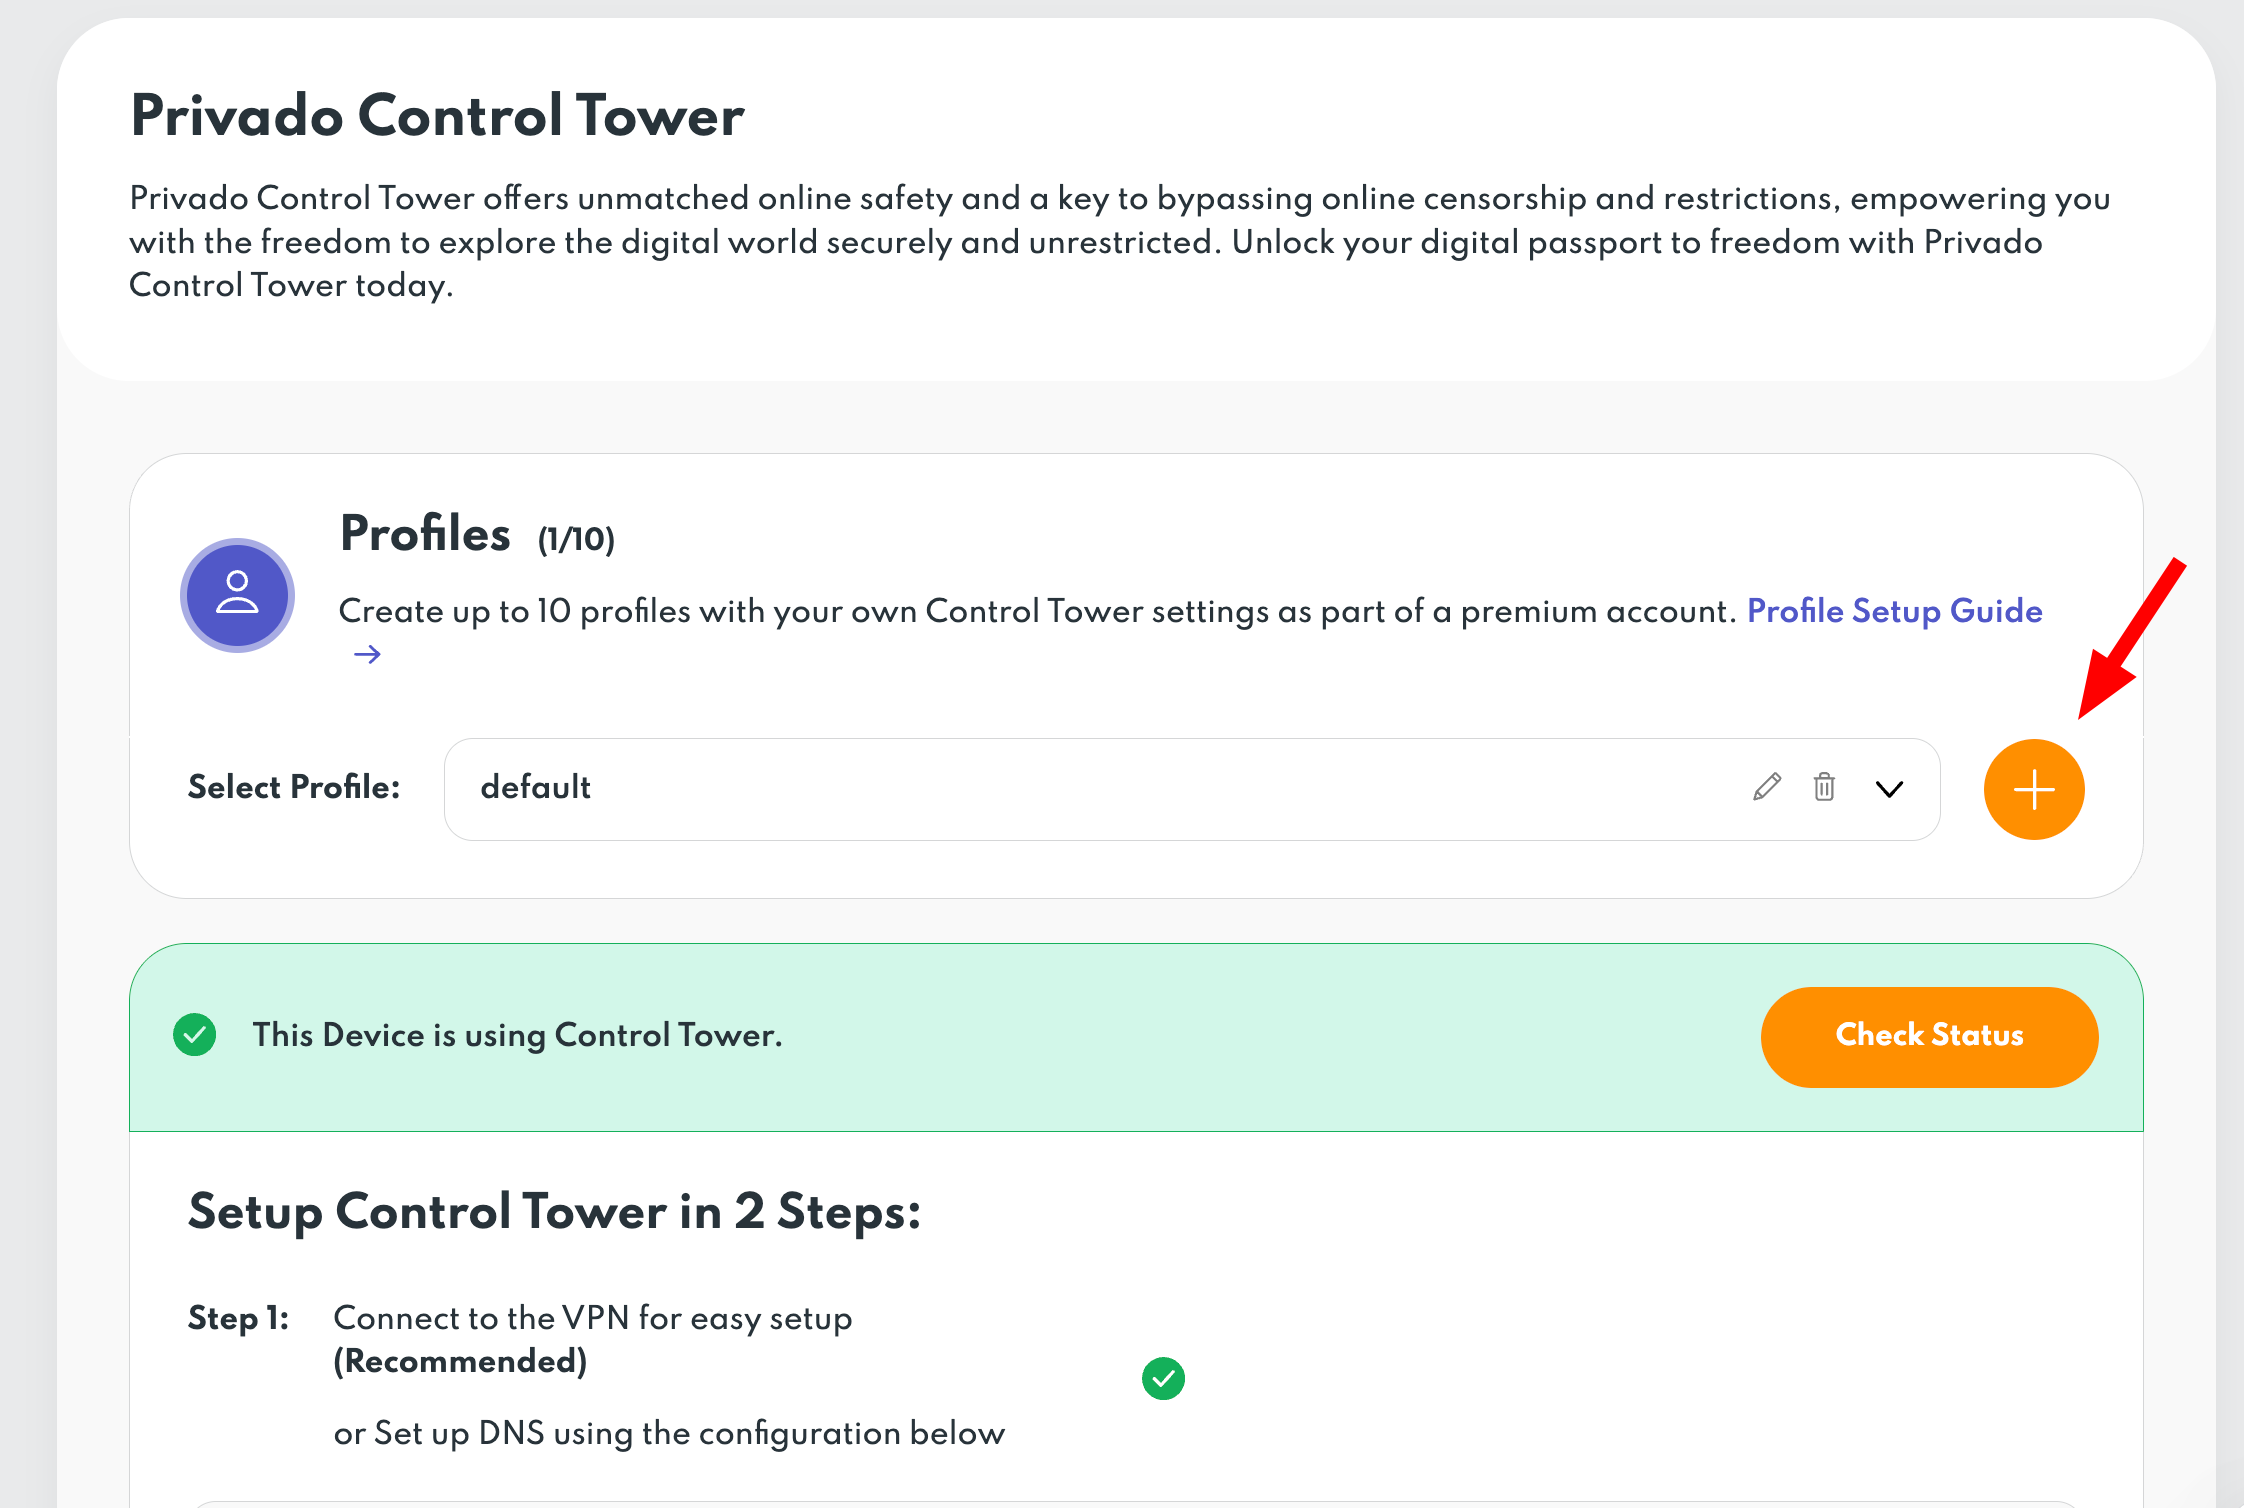
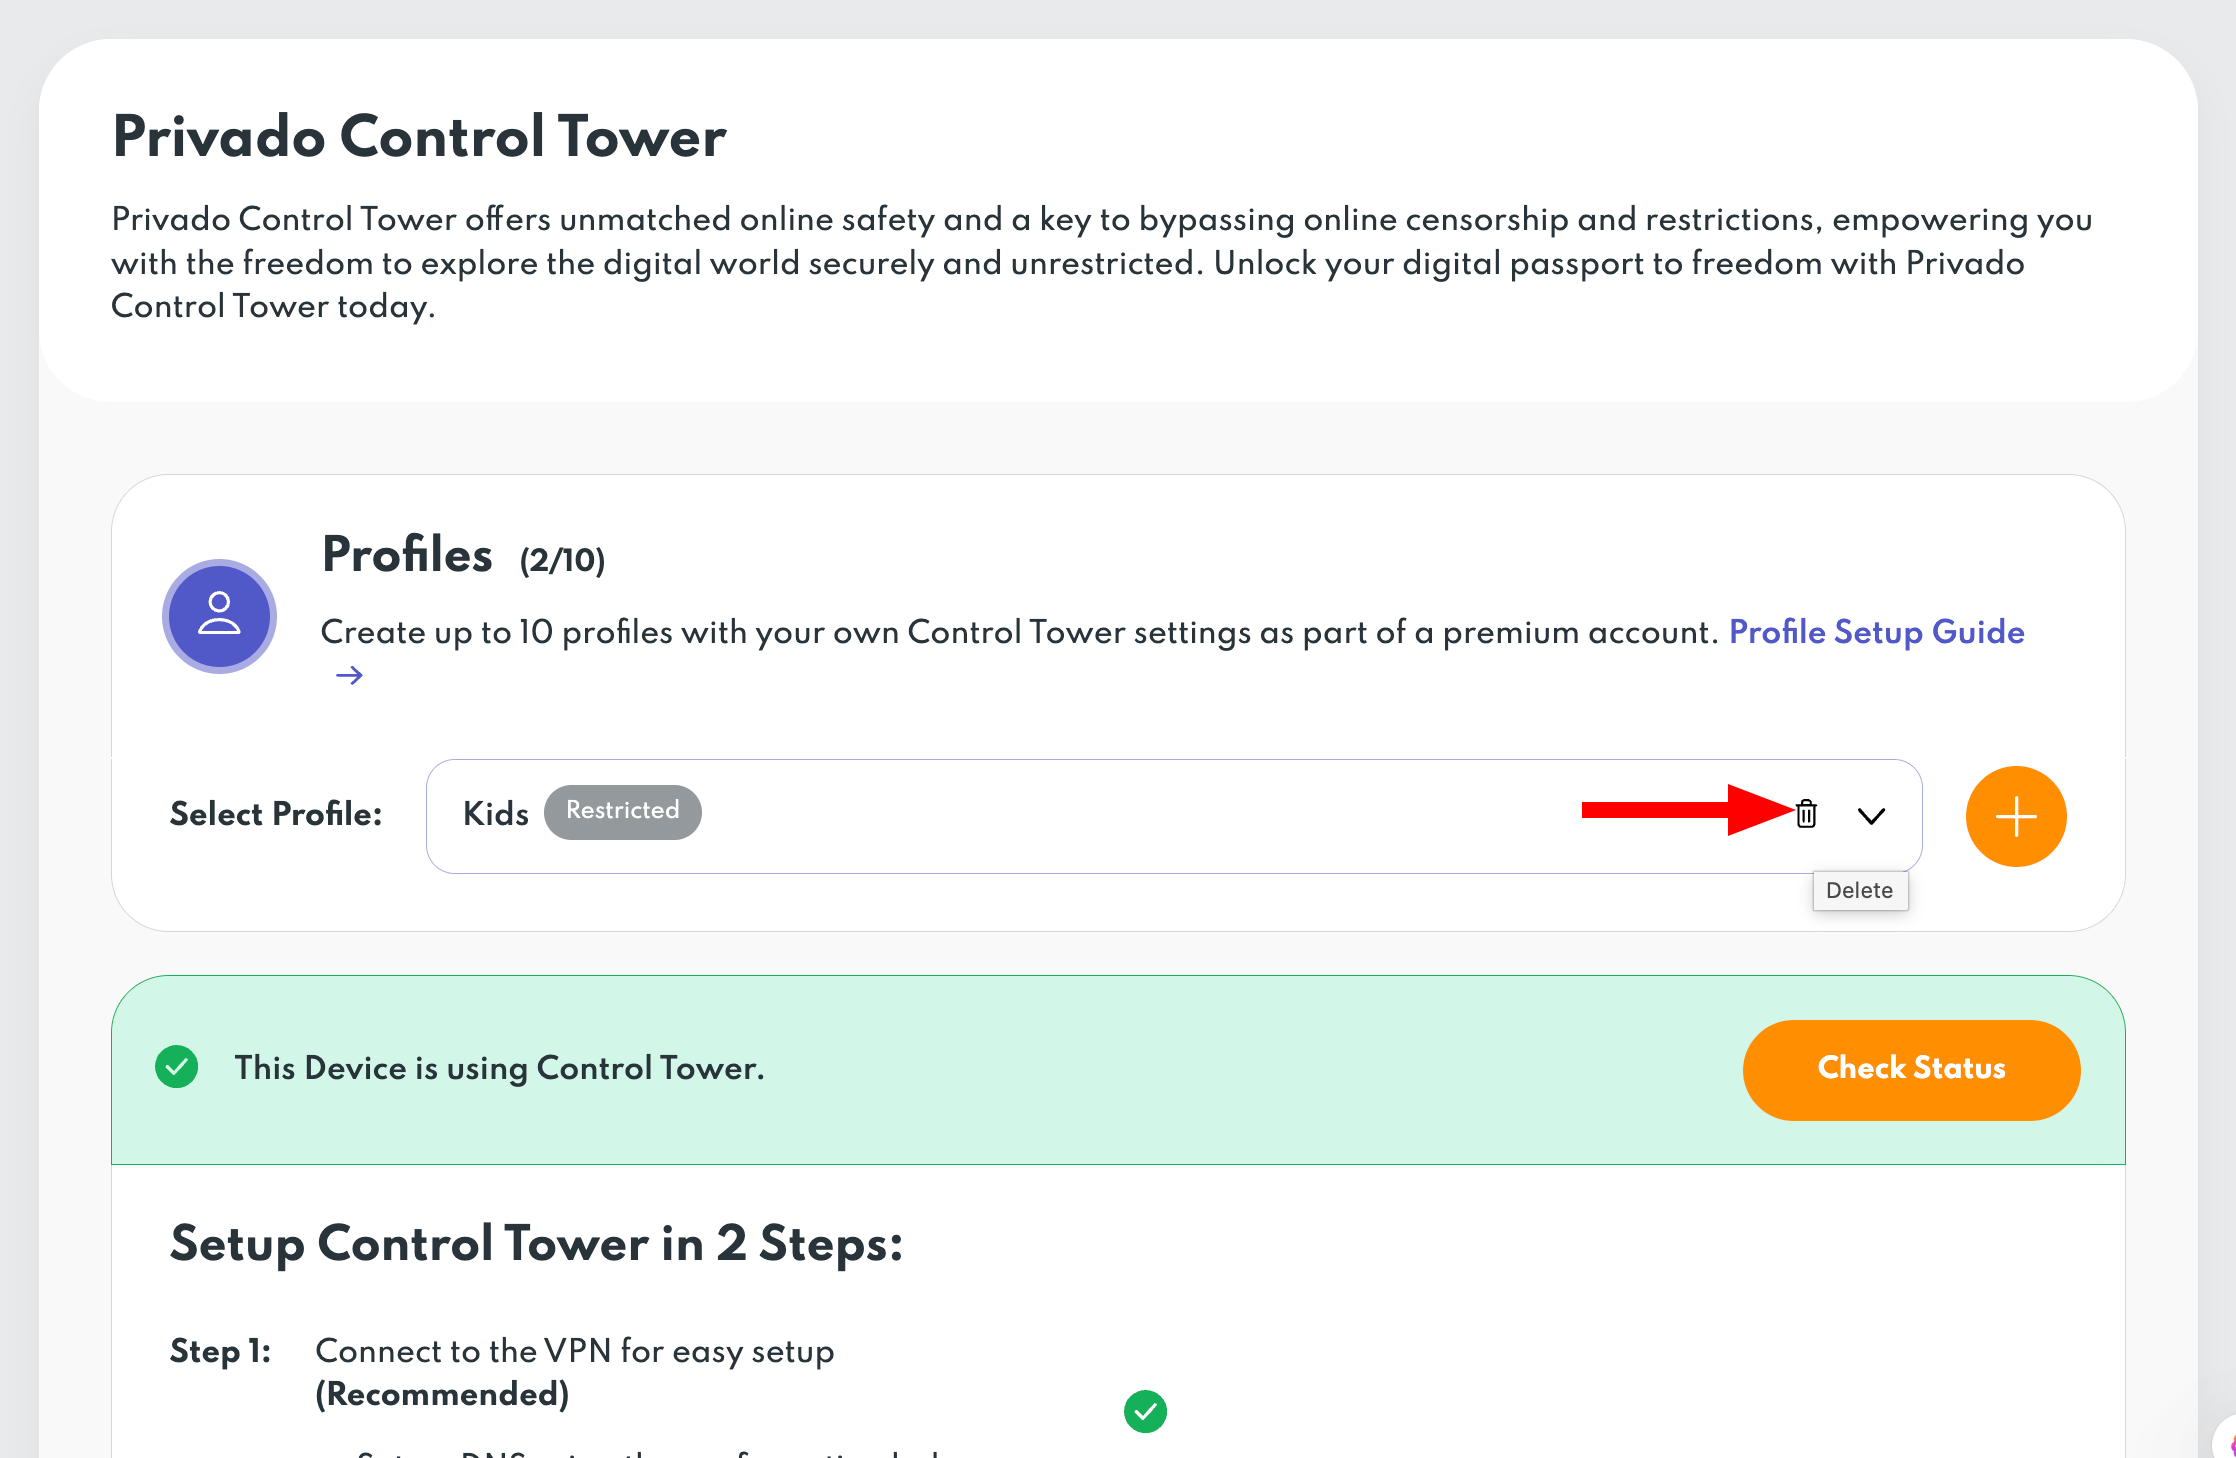
Control Tower Profiles enable custom settings managing what each device can access.
For example, you can create one profile with restrictions for children's devices and another for personal use without limitations, then link each device in the VPN app to the profile that fits its use. You can create up to 10 profiles.
Examples of How Profiles Can Be Used
Child Profile
-
Blocks adult content, ads, and social media.
Personal Profile
-
No content restrictions.
Work Profile
-
Filters social media and entertainment websites to help with productivity.
Create a Profile
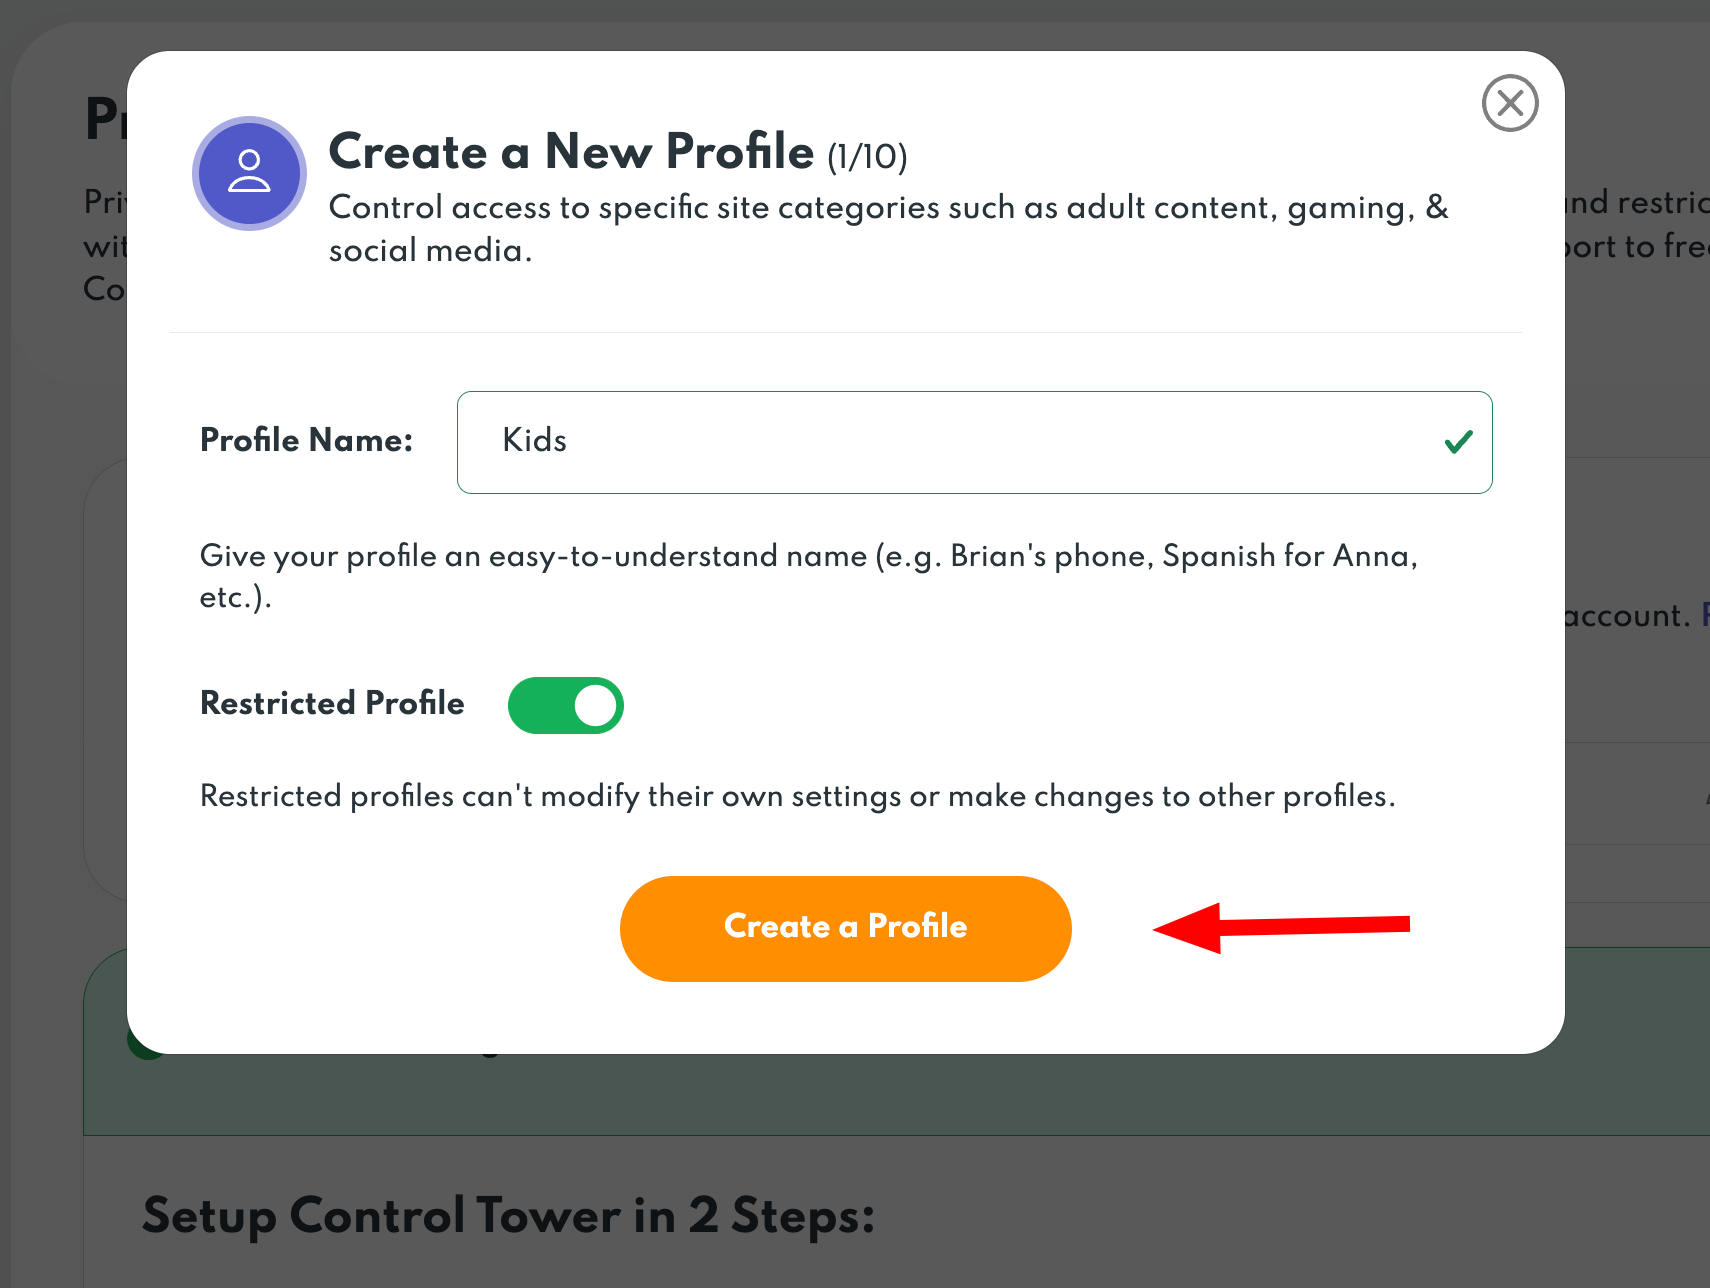
1. Visit Privado Control Tower and tap '+' to add a new profile.
- Name the profile and toggle the slider if you’d like to make it a Restricted Profile, then tap 'Create a Profile'.
***Restricted profiles cannot modify their own settings or other profiles.
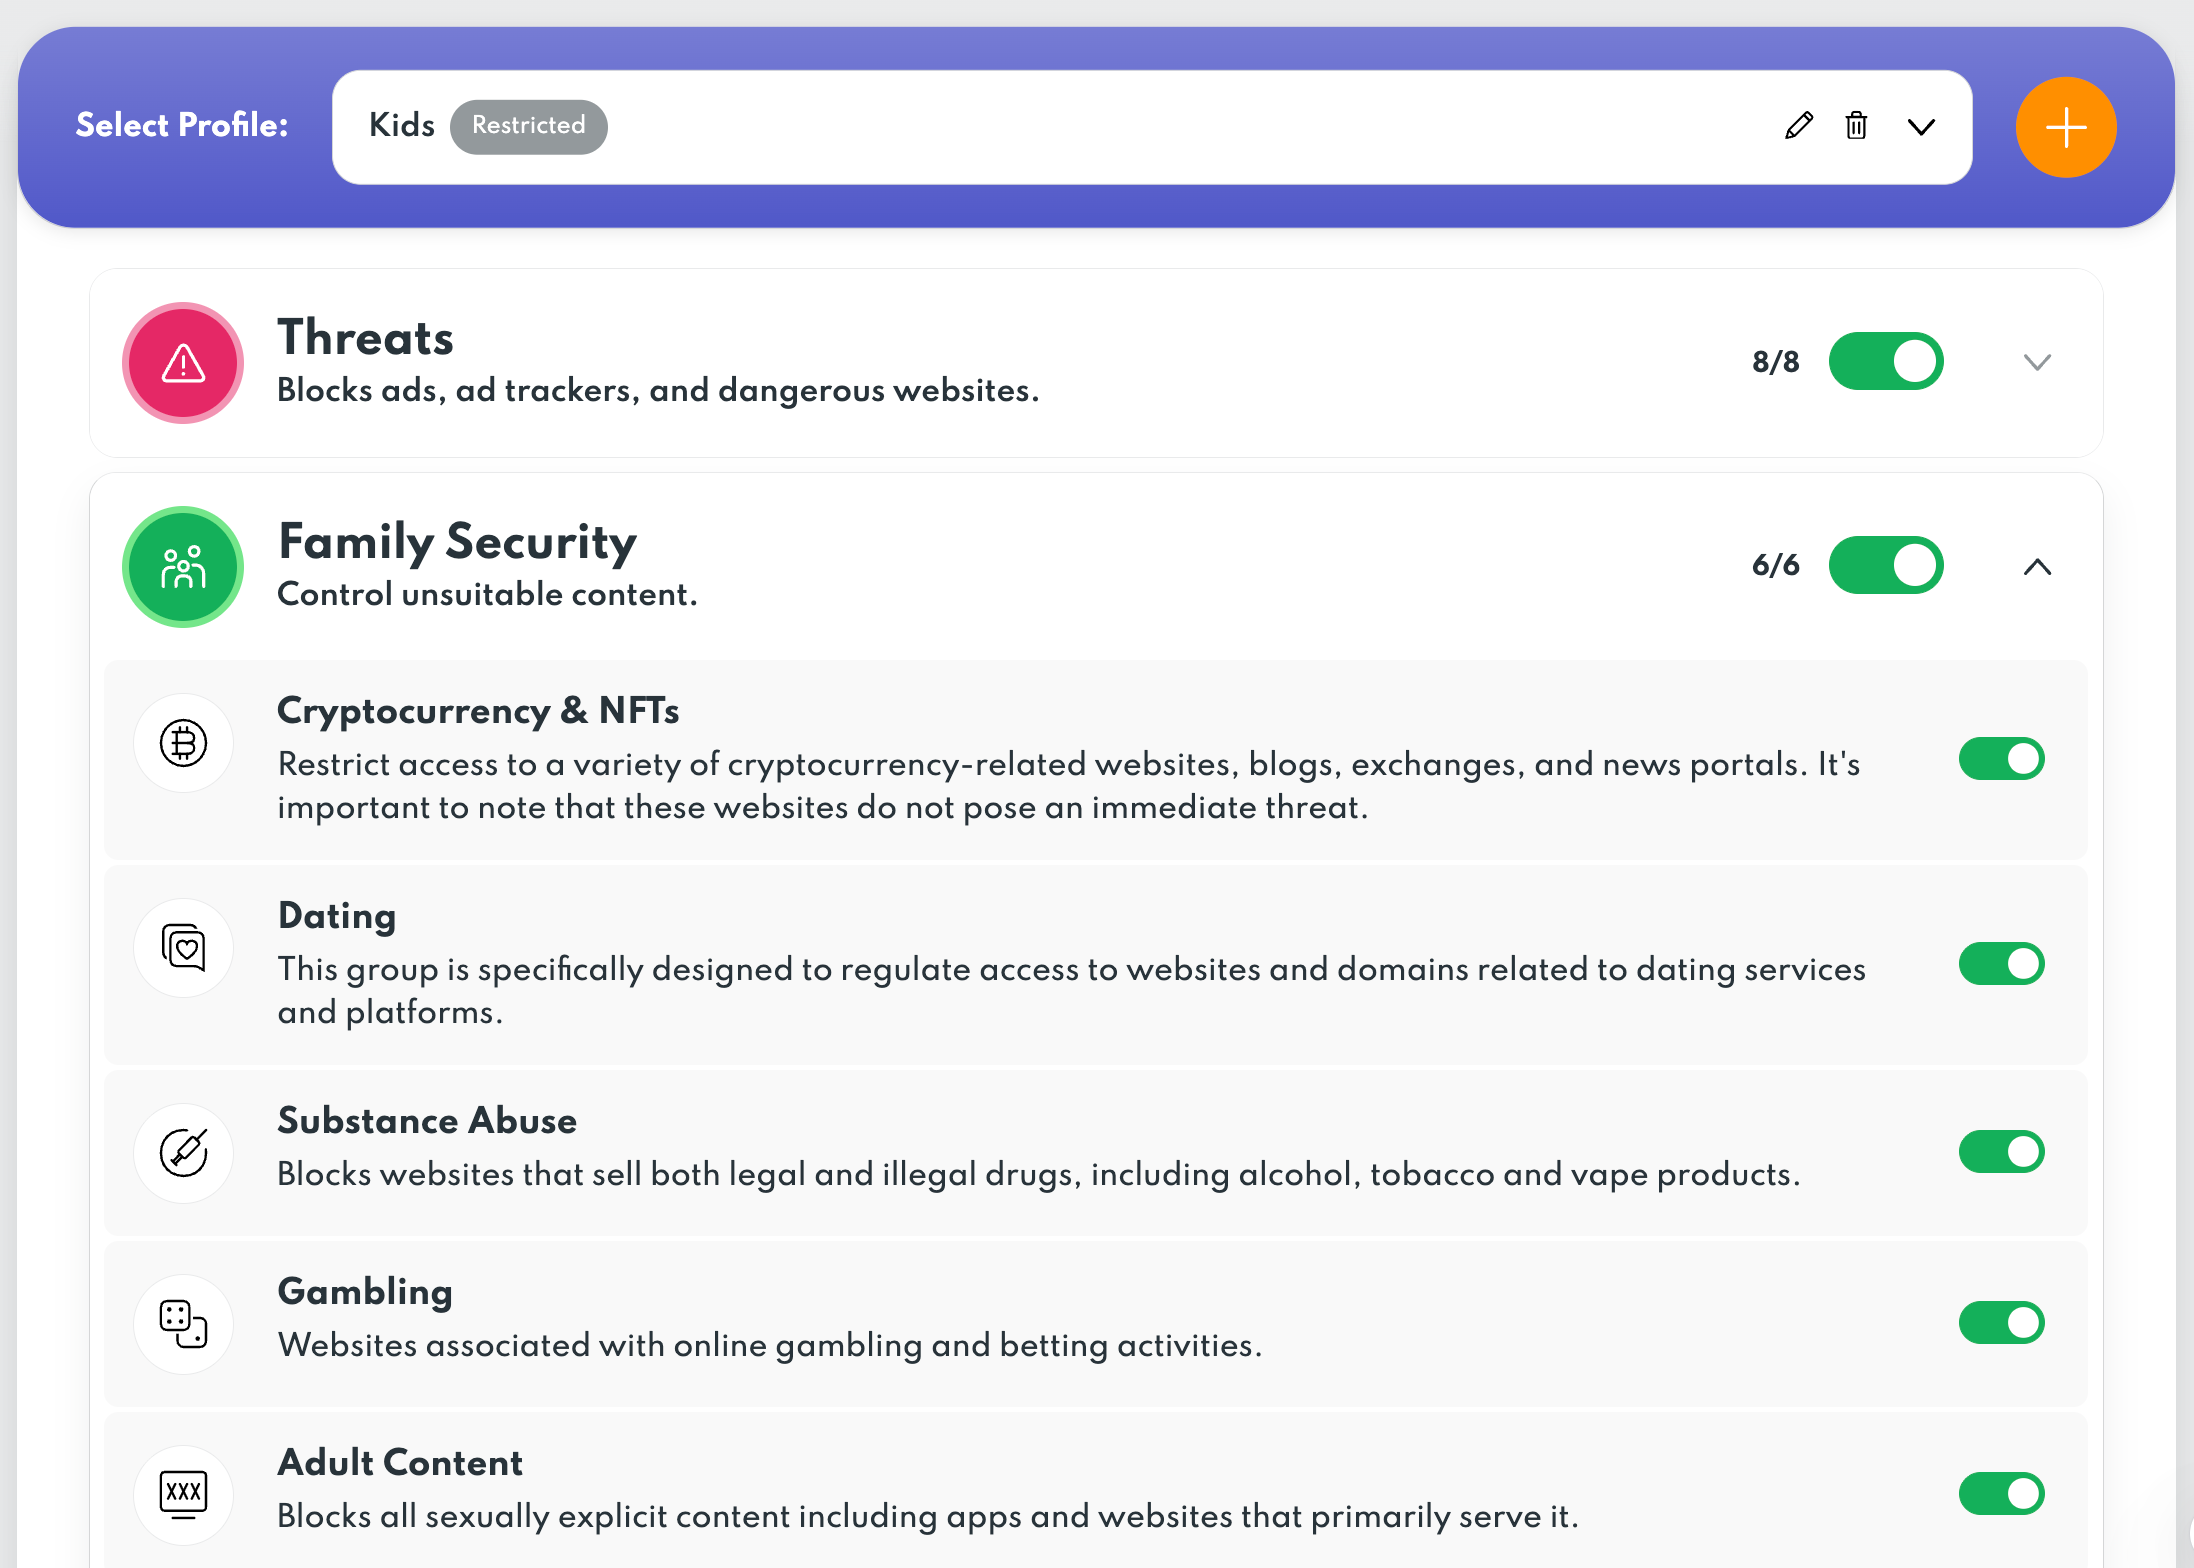
2. Tap ‘Manage Blocking Groups’.
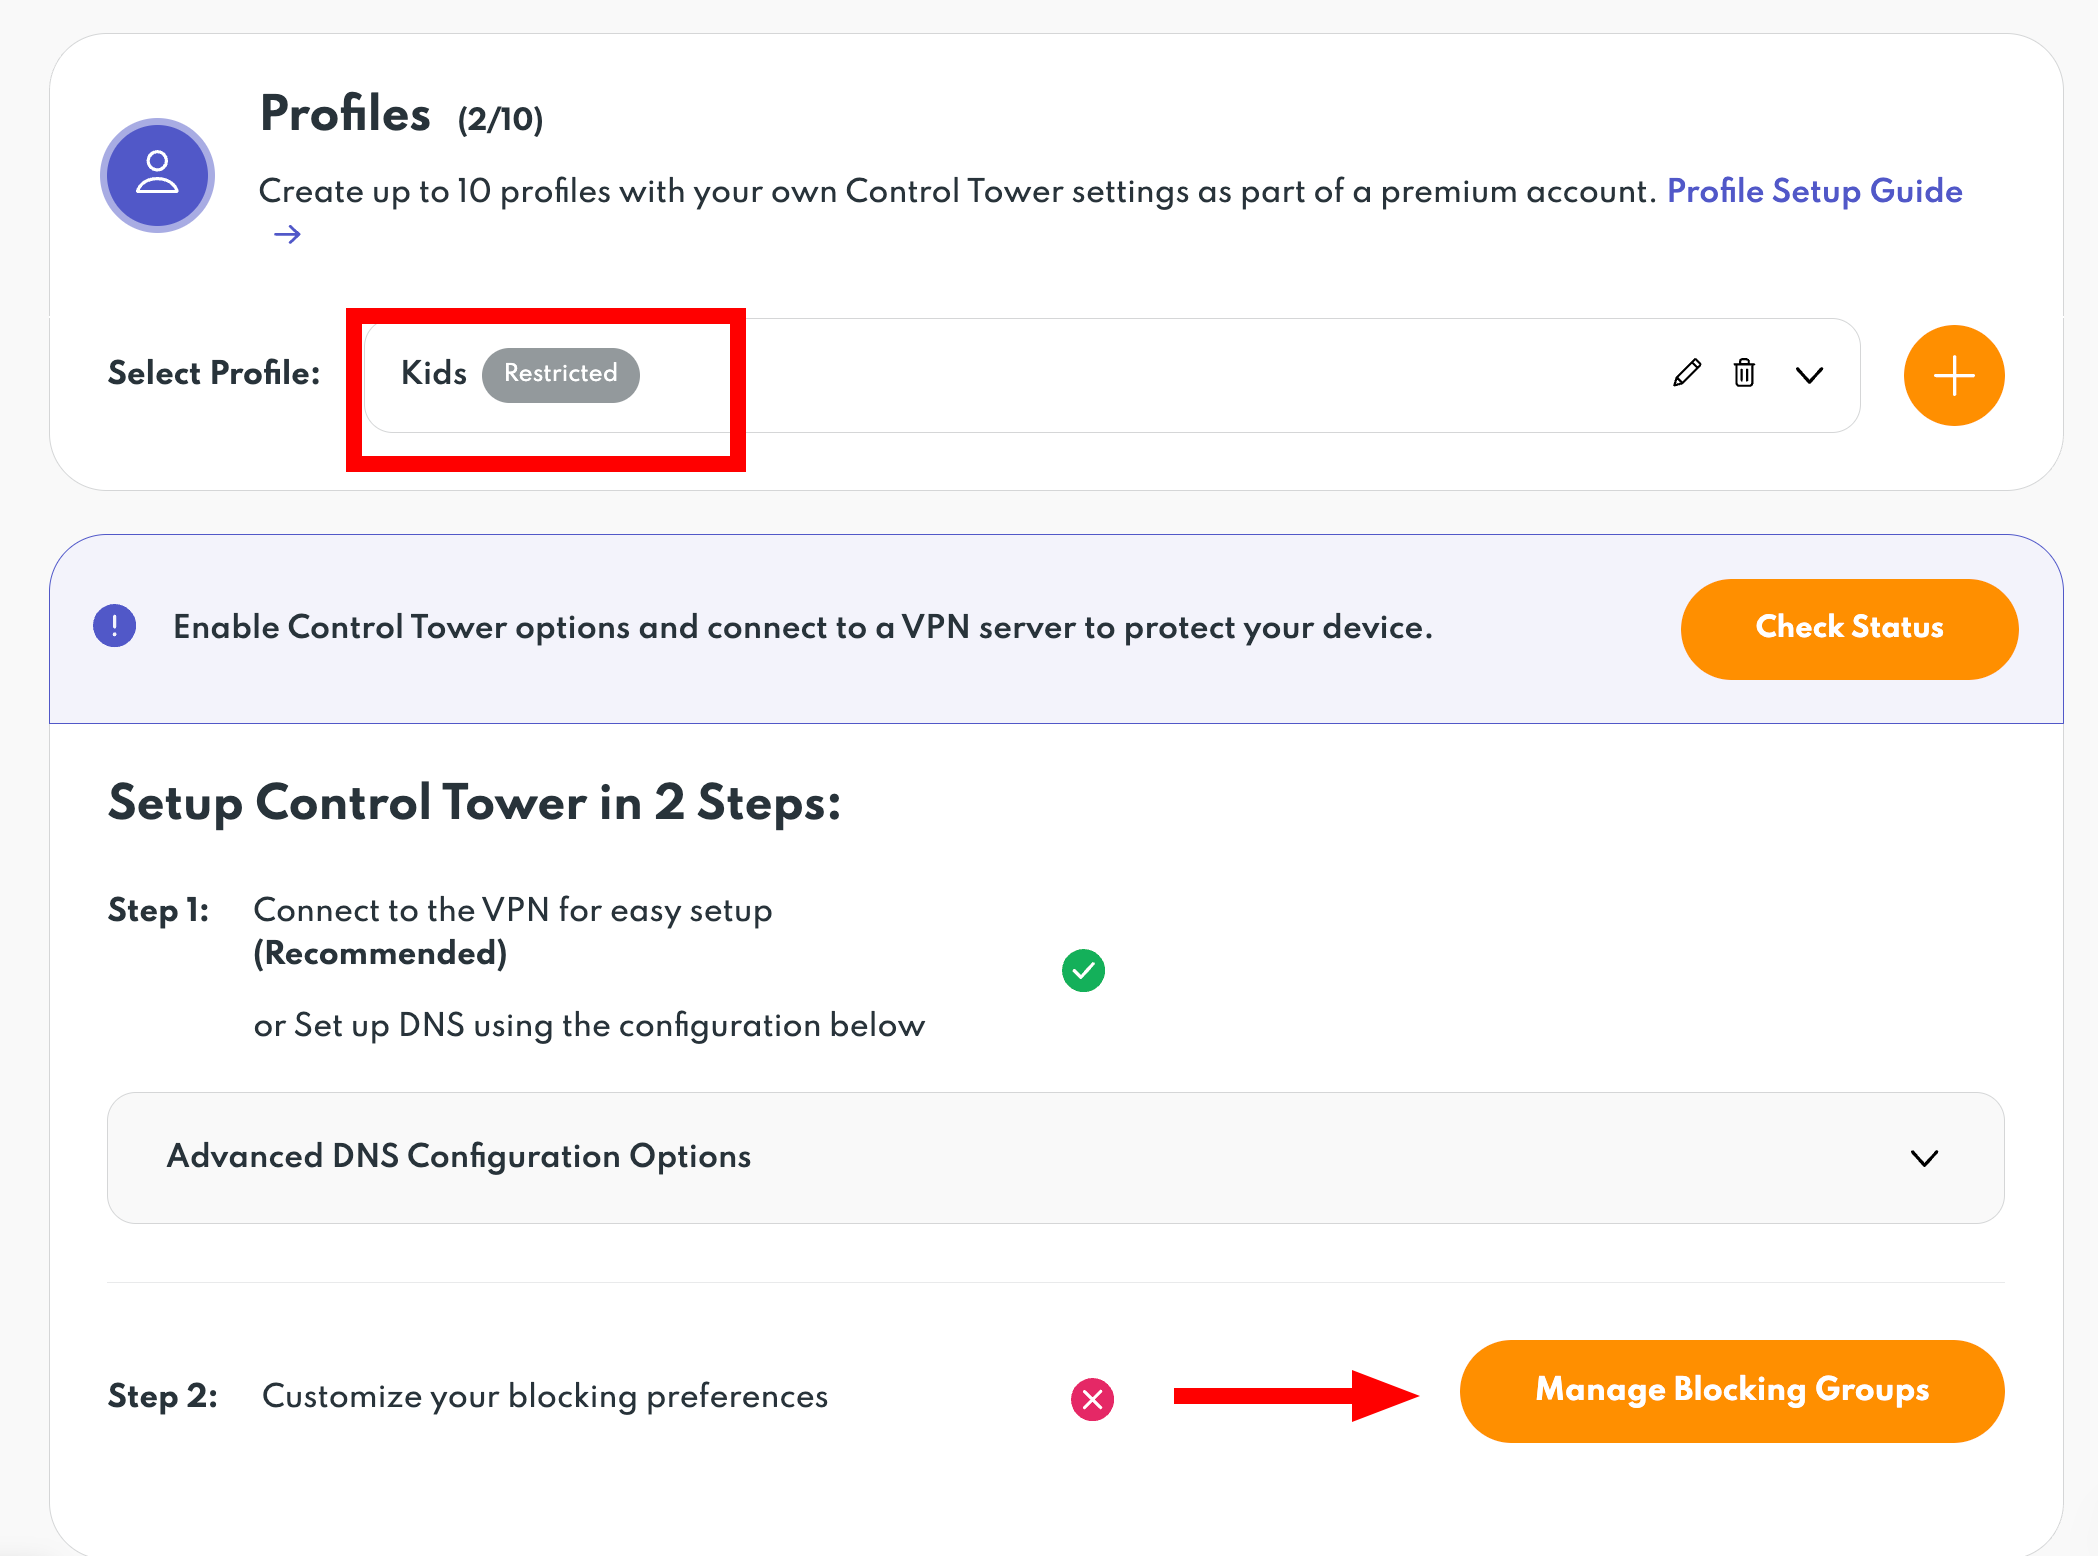
3. Select the groups you want to restrict for this profile.
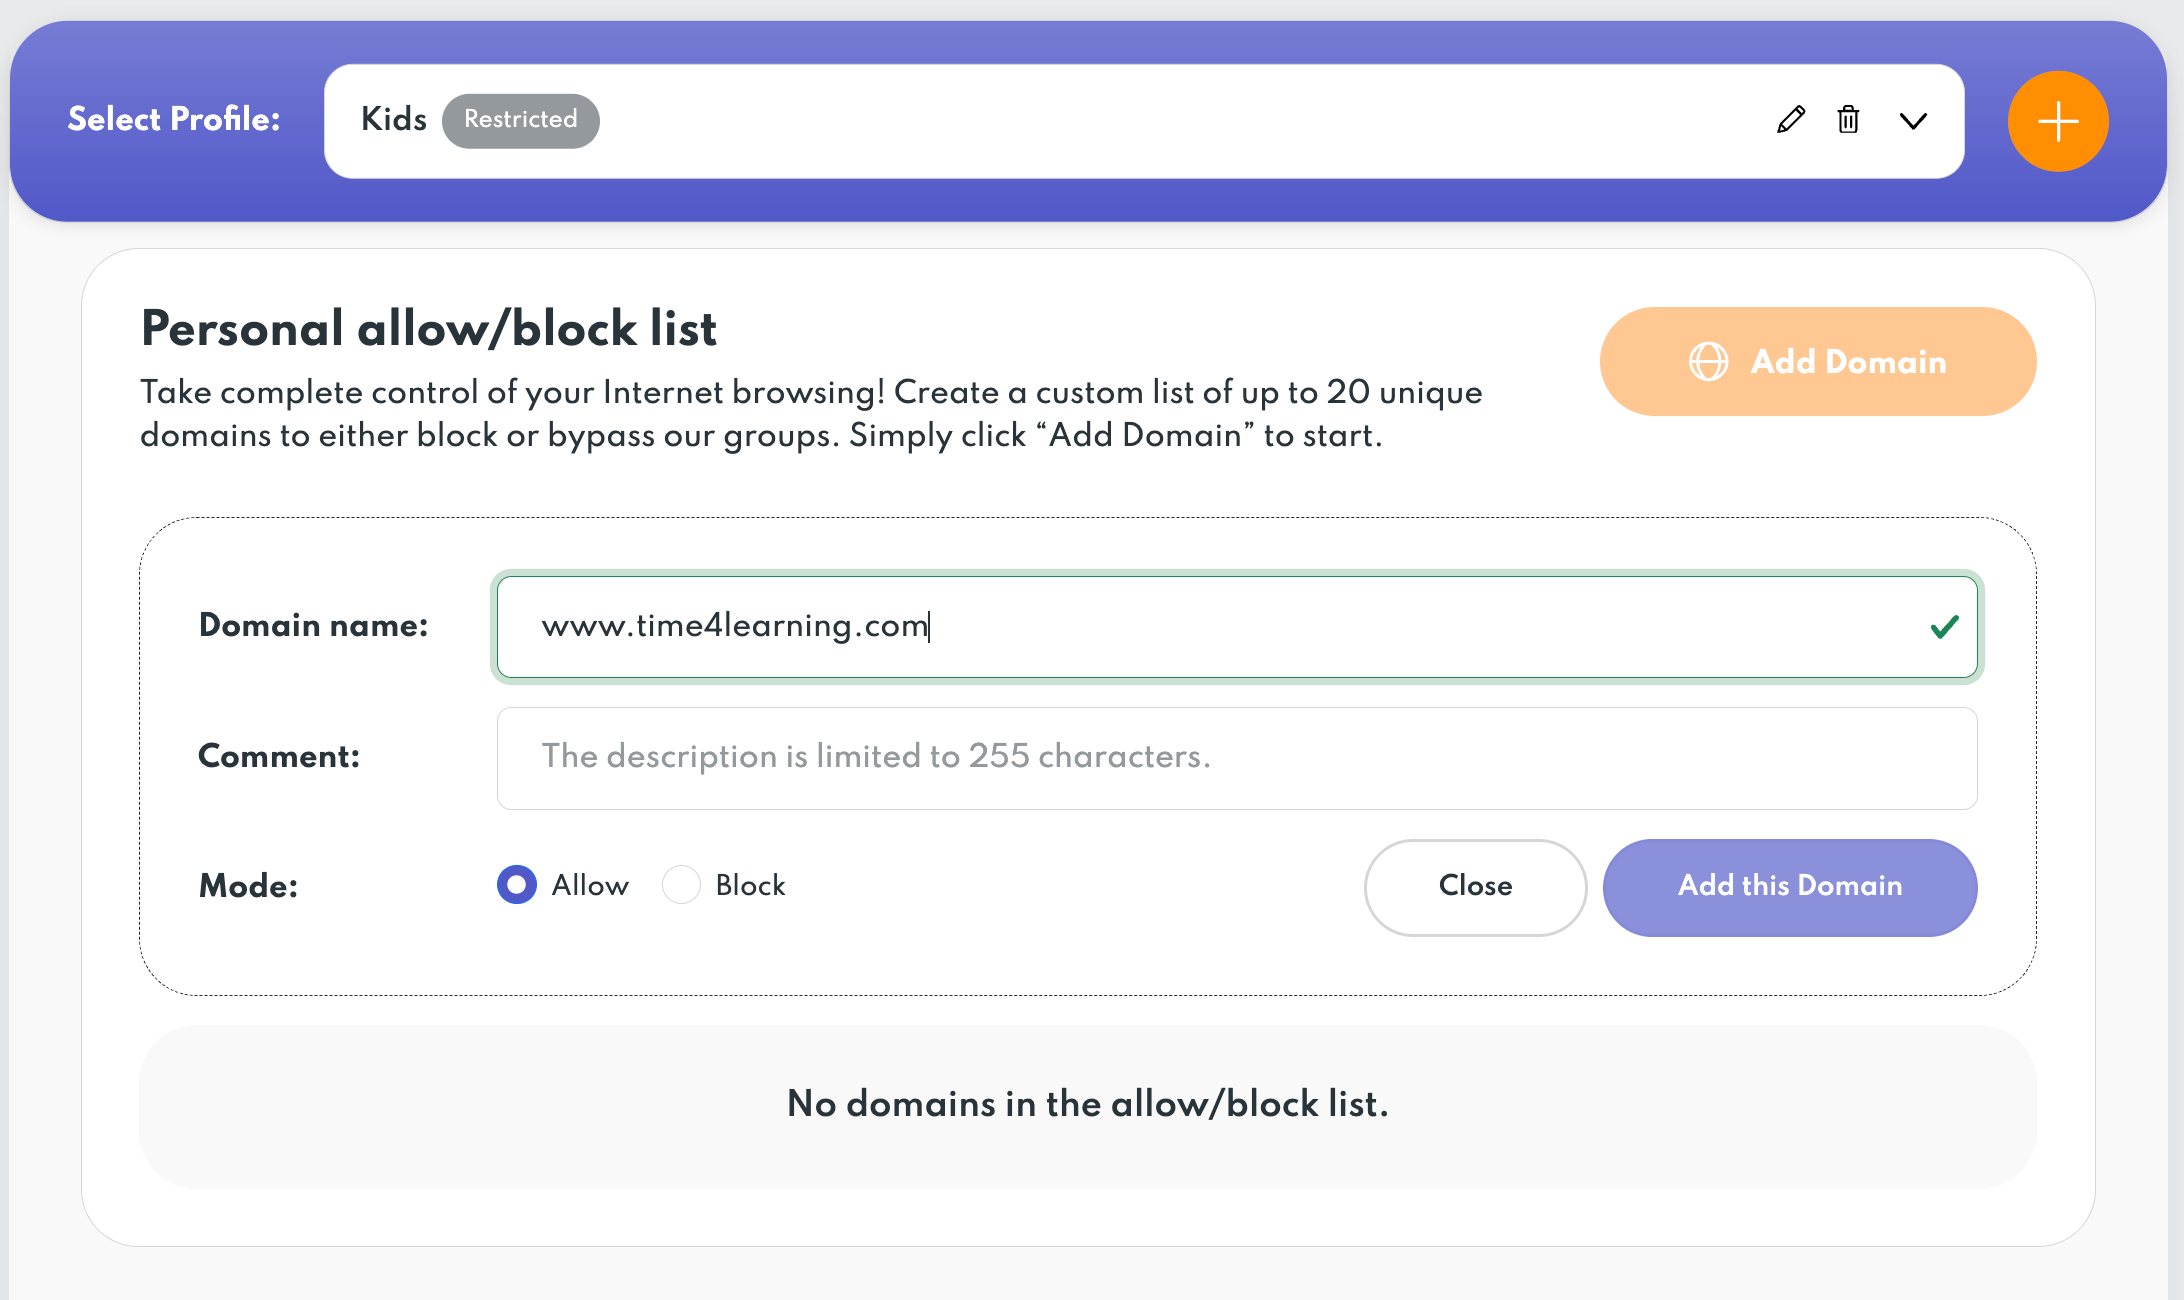
4. If the current filters block a good site or allow an unwanted one, create a custom list of up to 20 domains.
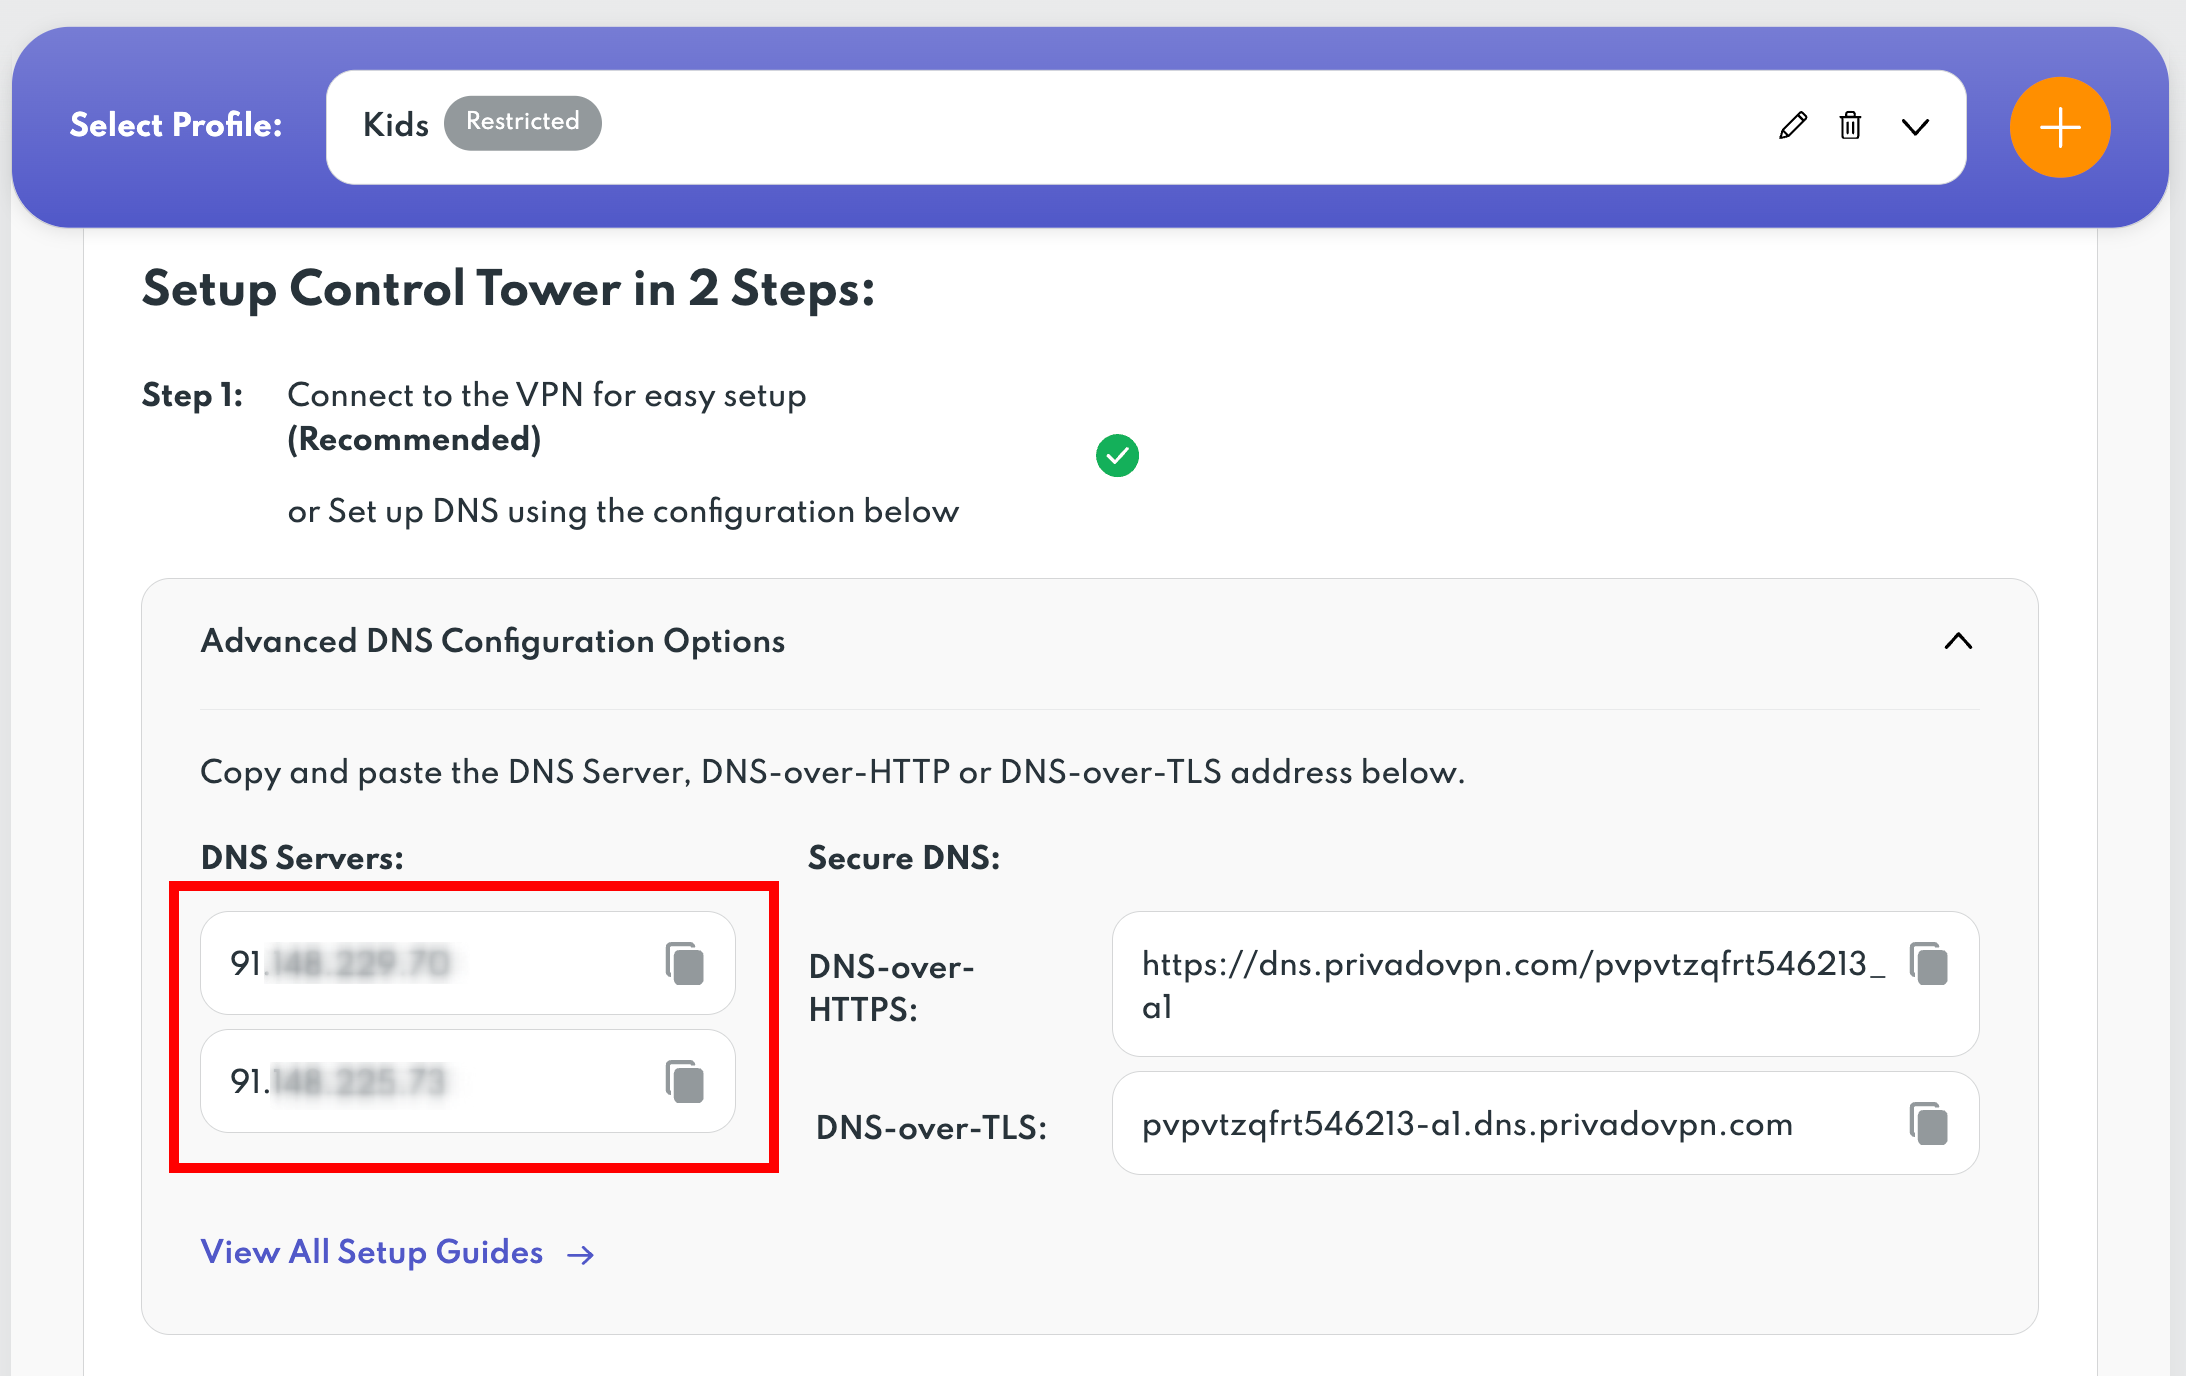
5. Now expand the 'Advanced DNS Configuration Options' for unique DNS numbers assigned to each profile.
- Enter these DNS numbers on a mobile device or a computer you wish to use with this profile according to a tutorial.
- After you complete the steps for a specific device, all the blocked groups should be effectively filtered.
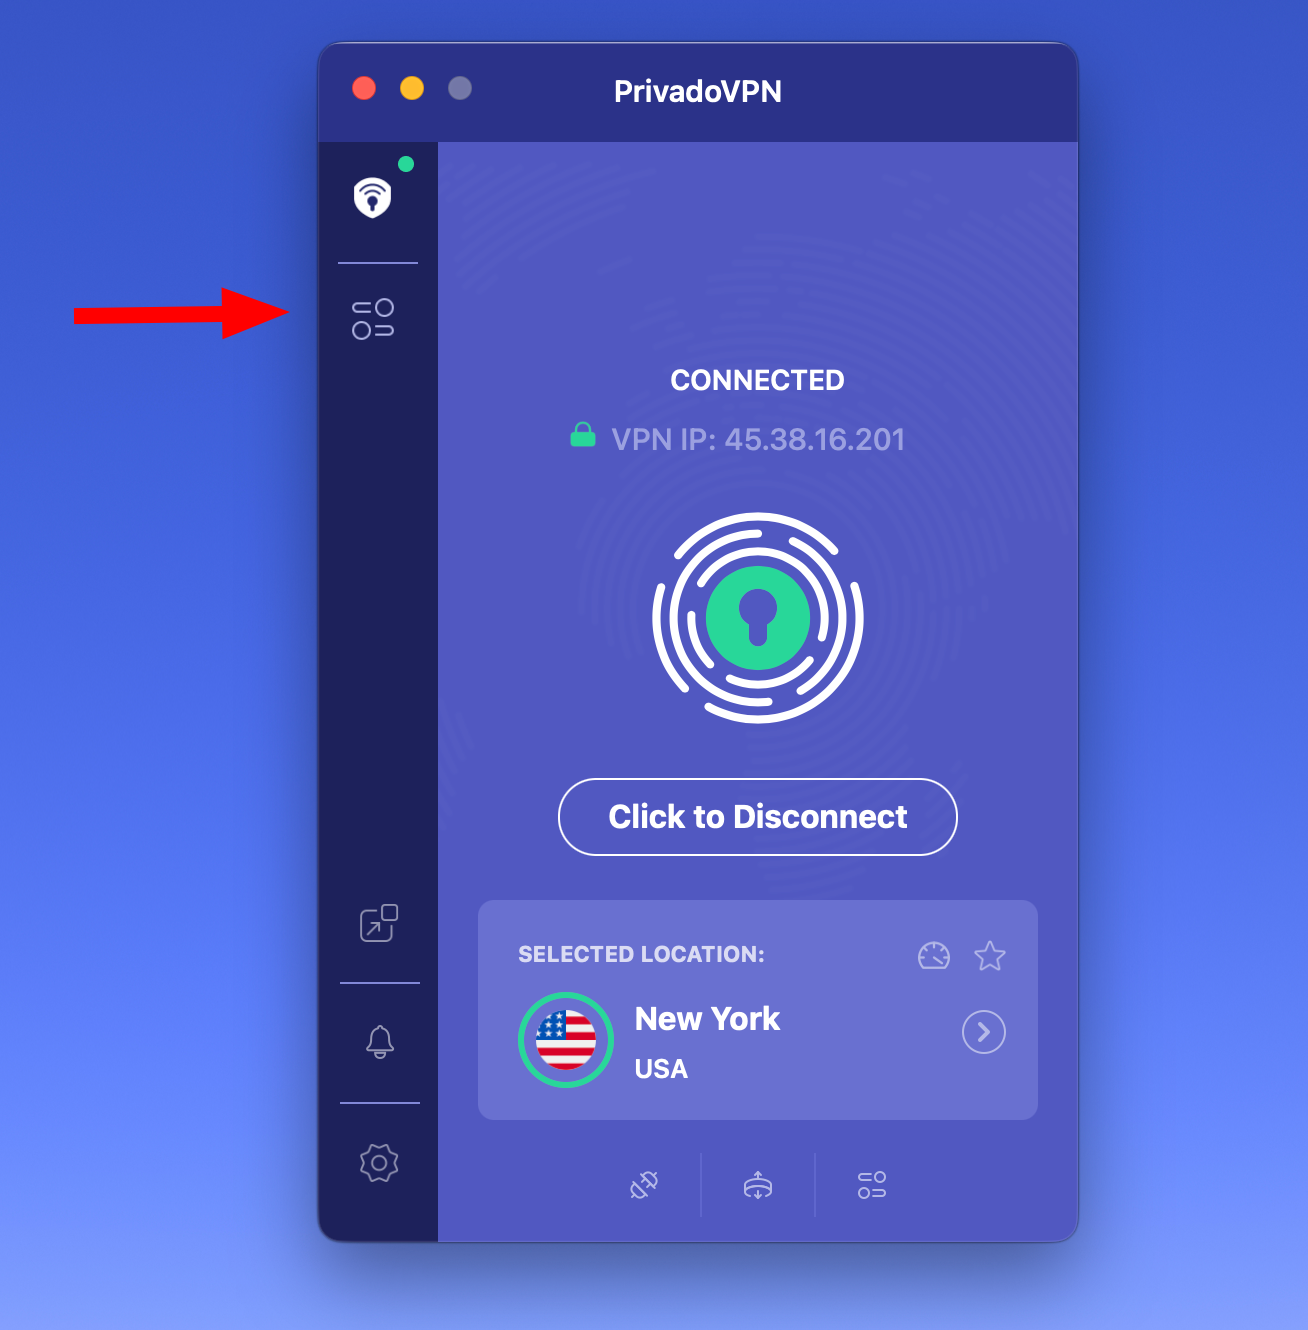
1. Install the Privado application and click the Control Tower icon.
2. Tap the icon in the upper corner to access the profiles.
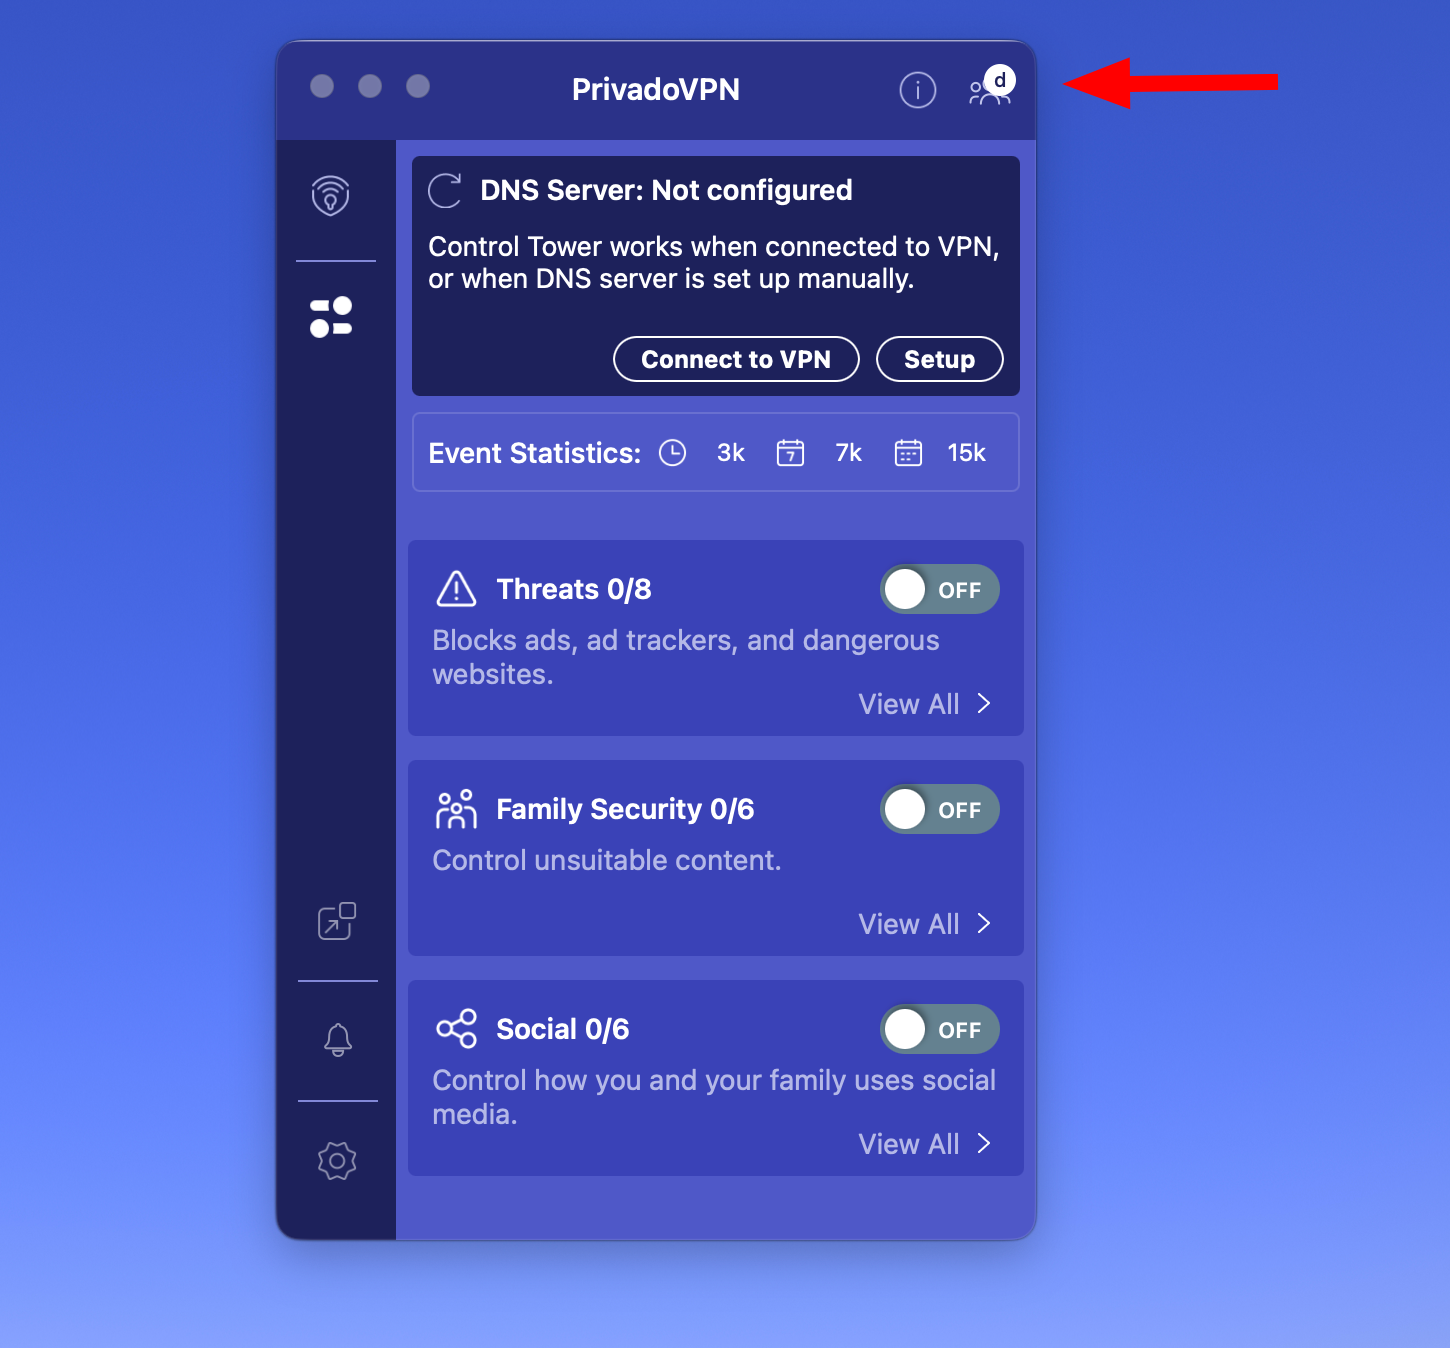
3. Find the profile you created and tap ‘Use Selected Profile’. Once the VPN connects, restricted content will be blocked in apps and browsers.

4. To disable a restricted profile, visit your admin panel again and delete it.
If you have any questions, please contact our Support Team: https://support.privado.live/new

